


- Web templates
- E-commerce Templates
- CMS & Blog Templates
- Facebook Templates
- Website Builders
FAQs
General Tutorials
Featured templates
og体育首页ONE Subscrioption


This tutorial shows how to edit WordPress theme with the customization tool.
WordPress. How to customize template using Theme Customizer
Please note that each template is unique and the number of options in the Customizer may vary according to the template design and layout.
In order to make the changes to WordPress using the Customization tool, you should do the following:
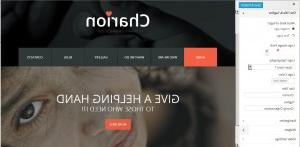
Log into your WordPress admin and navigate to Appearance -> Customize. The Customizer allows you to preview changes to your site before publishing them. You can also navigate to different pages on your site to preview them.
Under the ‘General’ tab of the Customizer you can change:
– Body background color;
– Body background image;
– Main background color;
– Header color;
– Header image;
– Link color;
– H1-H6 Headings font;
– Choose whether to display breadcrumbs;
– Choose whether to display the Search Box, etc.
To change the body background color, click ‘Select Color’. The color will apply to the template background right after you click it and the change will be visible on the right side of your customizer page.
To change the main body background image or the header image, please unfold the corresponding field in Customizer – General tab by clicking the arrow next to the field, click‘Select a File’, select the image of your PC, wait for the image to load and the page to refresh, and you will see the image applied to the site on the right side of your Customizer:

You can select the font for H1-H6 Headings:

If you find the changes applied matching your layout, do not forget to save them by clicking the ‘Save and Publish’ button at the top of the Customizer tool:

In the Site Title and Tagline field you can select what kind of logo to use – the image logo or the text logo.
To change the image logo, in the Logo Image Path field click ‘Select a file’ and upload the new logo image from your PC.
In the Logo Typography field you will be able to change the text logo font.
The text logo color can be selected in the Logo Color field.
You will also be able to change the Site Title and the Tagline:
Under the Navigation tab in the Customizer you can select the Header and Footer Menu font and color:

Under the Widgets section of the Customizer you will see the list of widget areas available. Open any widget area to add the new widgets to it or re-oder widgets if there are several widgets located in this area.
To add the new Widget to the widget area, please click ‘Add a Widget’. Select the widget from the right drop down menu and specify the title for it. Check the corresponding widget area on the site on the right side of the Customer in order to add the widget added to it:

In ‘Slider Settings’ you can select the type of Slider to display or disable the slider:

In Blog section of the Customizer you can change:
– Blog Title;
– Related Posts Title;
– Change the Blog Layout options;
– Set the Blog Image Size;
– Set Single Post Image Size;
– Select the format of Viewing Meta of the Blog;
– Choose whether to enable or disable the excerpt for blog posts;
– Button text for blog posts (read more):

In Portfolio section of the Customizer you will be able to change:
– Portfolio Filter options;
– Choose whether to show the Title;
– Excerpt options;
– Show Button options;
– Change the button text for portfolio posts (read more):

In the Footer section of the Customizer the Footer copyright text can be modified:

Feel free to check the detailed video tutorial below:
WordPress. How to customize template using Theme Customizer
We would also recommend you to read “How to build a WordPress website”.
If you’re searching for more professional solutions to build a website, have a look at premium wordpress website templates.
